Using Truecrypt to Encrypt Your Entire Hard Drive
By Randy Jensen | Apr 29, 2008
Getting Started
- First you will need to visit the TrueCrypt site and download and install it on your system. I’m going to be using Windows XP for my demonstration, but they have since released very good and stable version for Mac OSX and Linux.
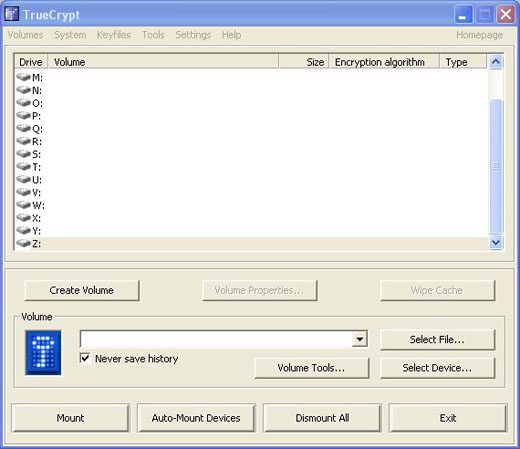
- Next, go ahead and open the main window by clicking on the TrueCrypt logo in the system tray. The window should look like this

Setting Up the Encryption Settings
- Click the the ‘Create Volume ‘ button
- On the next window, choose the radio button next to ‘Encrypt the system partition or entire system drive ‘

- You now have the option to ‘Encrypt the Windows system partition’ or ‘Encrypt the whole drive ‘. We will be choosing the latter for this example.

- For the next screen you can choose ‘Single Boot ‘ or ‘Multi-Boot’. More than likely you are only running one OS on your computer, so we will choose Single Boot.

- Now you can choose the encryption settings. Unless you really know
what you are doing, the default settings are fine. AES is an incredibly
powerful encryption algorithm and should be all you need. I would also
leave the Hash Algorithm at RIPEMD-160

- Next you will need to create a password. Depending on how paranoid
you are, you should choose a passphrase close to 20 characters in
length. I would also recommend using Steve Gibson’s Perfect Passwords Generator to make sure you create a completely unique phrase.

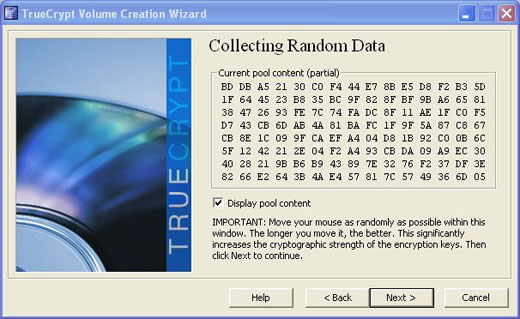
- Next you will need to move your mouse around the TrueCrypt window to
create randomized data. This is fairly important, so spend a minute or
two moving your mouse to make sure you really randomize things.

- The next window should simply be showing you the keys that were generated for you. You can simply click next here.

Creating the Rescue Disk
- The next step is to create what TrueCrypt calls the ‘Rescue Disk’.
This disk will be used in case the boot loader or Windows become corrupt
or infected with malware, yu will always have a way to decrypt the
system. This step is extremely important, and TC will not let you
proceed until it is satisfied that you did everything correctly. Begin
by clicking the ‘Browse ‘ button. This will bring up a
dialog box. Browse to your desktop and name the file something like
rescueDisk.iso. IMPORTANT: remember to append the .iso or your file will
not work correctly.

- You should now see a window telling you the file was created
successfully. It’s now time to burn the newly created .iso file to a cd.
I strongly recommend using ImgBurn . If for some reason that doesn’t work, you can use something like CD Burner XP Pro . Click next

- Make sure you have a blank CD in your drive and open ImgBurn. Click on ‘Write image file to disc’

- Next click on the ‘Browse for a file’ button

- Finally click the giant ‘Write’ button towards the bottom

- After you have the disc burned, leave it in the drive and click ‘Next’ in the TrueCrypt window

- If all went well you will be notified that the Rescue Disk was successfully verified

Pretest and Installing the Bootloader
- You can choose to wipe the drive to really give you an incredibly
secure hard drive, or just choose none if you aren’t storing government
secrets on your computer (not that the government is intelligent enough
to encrypt hard drives).

- Next TC will begin the pretest to make sure everything is in working
order before it begins the encryption process. This will also install
the TrueCrypt boot loader on the boot sector of your hard drive. This is
a major reason why this encryption is so great. There is virtually no
way to boot into the Windows file system without having the decryption
key. Click ‘Test ‘

A friendly warning:)

- After TC runs a few things you will be presented with a window to restart. Click ‘Yes ‘

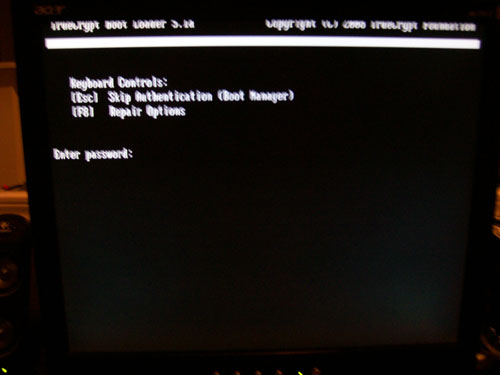
- After the computer boots back up, you should see a black and white screen. Enter your passphrase you created earlier.

- If all went well you will now see a new dialog box saying the pretest was completed successfully.

- Click ‘OK’ on the Rescue Disk information window

Finally! Encrypting the Drive
- Whew! If you’ve made it this far, congratulations! We are now ready
to encrypt the drive. You should see a window similar to the one below.
Simply click the ‘Encrypt’ button and depending on your wipe mode and
your encryption algorithms, go have a cup of coffee or go to sleep and
let it run overnight.

- When everything is done, you should see this

In Closing
This is really helpful if you travel a lot and carry a laptop all the time. If something were to happen and it gets lost or stolen, yes, you lose the data but at least whoever has it can’t get it either. Of course this means we need some training in the art of backing up;)
Няма коментари:
Публикуване на коментар